Aquiring the nessesary software Before we can actually transfer anything to our SD card we need to make sure it's clean and propperly formatted. Luckily for us the SD Association have made a free tool called "SD Formatter" that does this via a click of a button for us. Secondly we also need something to propperly install the Image to our Raspberry PI. For that we'll be using a community made tool by tweaking4all.com. Another free tool that "bakes" our Raspberry PI with the image of choice. Download linkes for both are set below. Preparing our SD Card
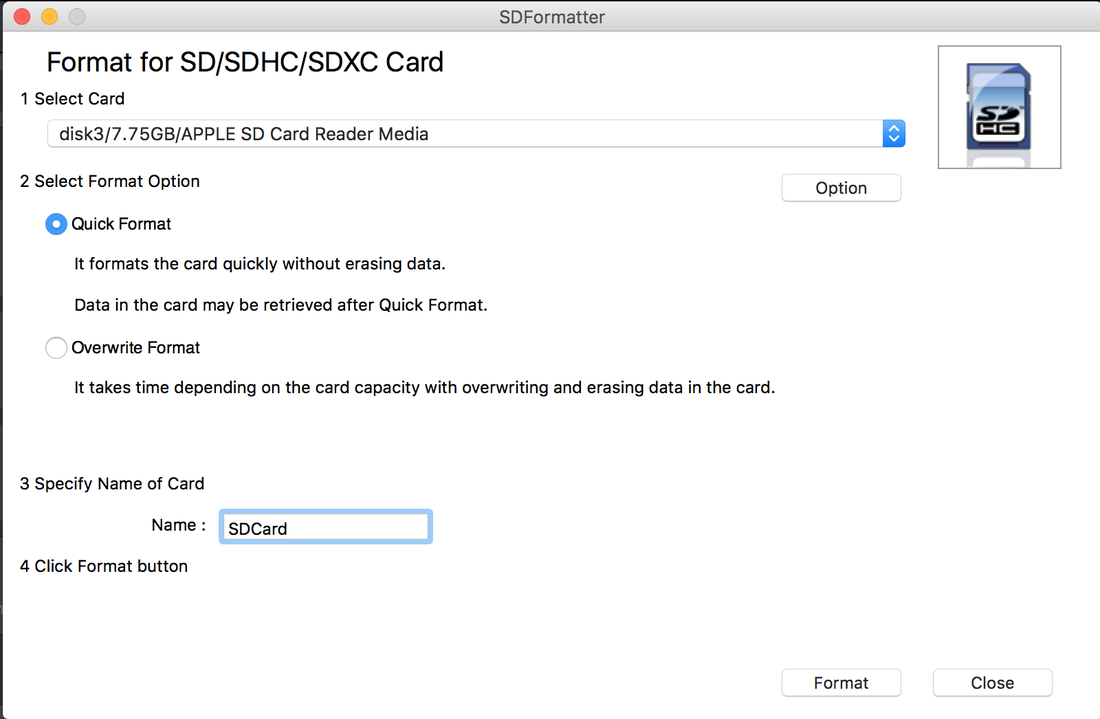 A "Card Format complete" message will appear when the SD Card is ready  Installing the image (.img) file
note: this may take a VERY long time and the program may occationally look frozen during the application process. If this does happen: be patient and let it run.  When the installation process is complete you'll recieve a completion message like the one below. That's it! You're raspberry PI should now be ready for use! Simply remove the SD Card and plug it into your Raspberry PI and power it up. The PI should boot straight into the OS you chose. 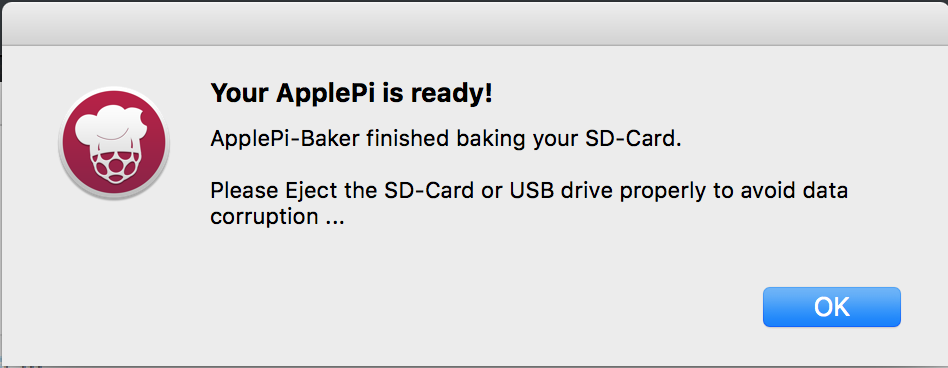 Troubleshoot Most problems are usually tied to either having the wrong image or an incompatible version for your PI. Please check the following before leaving help requests:
0 Comments
Leave a Reply. |

Author
SysAdmin, coder and tech enthusiast. Archives
Categories
|
 RSS Feed
